5 Reasons Guitar Is The Perfect First Instrument To Learn

The guitar has been a part of music history for decades, and its versatility has put it on the map as one of the most compelling musical instruments to play. The cool factor of the guitar has also added to its allure, as many iconic and talented guitar players, such as Stevie Ray Vaughan and Jimi Hendrix, have pushed and showcased the instrument’s capabilities. Its popularity has made it one of the most common instruments ever to grace the music scene. It is typically a fan favourite amongst first-time music pursuers, as its appeal has won over the hearts and minds of many enthusiasts of genres like rock, country, folk, blues, etc. It is also an excellent instrument for a beginner, and here are 5 reasons the guitar is the perfect first instrument to learn:

1. Easy To Obtain

Accessibility 

Chances are you know someone who plays guitar or knows someone who knows someone that does. Whether it is an acoustic or the much-coveted electric guitar, they are virtually all around us and an extremely accessible instrument to obtain. 

There are also so many resources to assist you in the learning process, like books, videos, and online guitar lessons, which make it very convenient and accessible. 

Affordability 

You may be thinking that guitars are super pricey instruments, which they can certainly be. However, in comparison to instruments like pianos or saxophones, the guitar may definitely fall into your budget more gracefully. $300 on a guitar might seem a lot more appealing than dropping thousands of dollars instead. You can also find many guitars and guitar equipment in second-hand stores, which is always an alternative in saving money.

2. Easy To Learn

The instrument may be extremely complex but possesses an incredibly easy learning curve for beginners. For those that want to pick up the guitar, you can rest assured that while it will take a lot of time to learn and practice, it is a simple learning process. Quickly, you will find yourself being able to play using some basic chords. 

A recommendation that Fender has is to record yourself, as you will be able to see and hear your progress in an objective way. You will be able to spot what you are doing right, wrong and where you can improve. 

Lessons are remarkable for teaching you exactly what you need to know, and learning from a great teacher can definitely help you along with your progress. In no time, you will be able to nail any hammer-ons and pull-offs.

3. Versatile 

Think of how many different musical stylings there are that features a guitar. There are so many genres, techniques, and possibilities that can be pulled off with this polyphonic instrument. From classical to flamenco to screaming electric guitar solos – it is extremely versatile.

Polyphonic?

A polyphonic instrument is one that can simultaneously play multiple notes at once. The six strings are able to produce different tones, which means that almost all the music you want can be translated to the guitar. This opens the door to more options and versatility for a guitar player.

The versatility factor is another added appeal this instrument has. As a guitarist, you can explore a wide variety of sounds and styles. Acoustic, classical, and electric guitars all possess their own unique sounds and abilities. The better quality the instrument, the more wonderful it will likely sound.

4. Community

The guitar is a great instrument that can aid in socializing and forming bonds with other people. For some, playing guitar alone can be a very therapeutic and calming thing, but when you open up the ability to play with others, it’s a whole new feeling. You will make friends and form connections with other people who love and have an interest in music. It may even help you overcome reservations and bring you out of your shell. 

The community is where many people form bands, write music, play shows, and sometimes go on tour together. Just think of the possibilities the guitar can create for you and the potential of lifelong friends and bandmates. 

5. It’s Good for You

Believe it or not, playing guitar is a healthy habit to have as it can aid in increasing your brain function and sharpen your motor skills. Music has a lot of beneficial properties;it can do things for your brain that other activities just cannot replicate. 

Coordinating your hand movements can sometimes take a lot of work, but it is something your brain might not have been able to do without learning how to play the guitar. Memorizing and recalling what notes to play at the precise time takes a lot of brain power as well. One hand controls plucking, while the other has to focus on where to press down.  

It is also great for your mental health. It keeps you occupied, stimulated,  and gives you an outlet to express yourself. Music is a beautiful thing to have access to, and luckily, it’s all around us. 

Don’t hesitate!  Start your musical journey with the guitar today. There are outlets and opportunities for you to pick it up, so feel free to partake in lessons or play around with the instrument. You may find that it becomes your next obsession, and as we stated, it is a good obsession to have.

10 Tips On How To Keep Your Singing Voice Healthy

As a singer, your voice is your instrument. Whether it is professional, aspiring, or simply meant for the shower and karaoke, your voice is essential. Many people think that a solid or beautiful singing voice comes down to how you belt out those words, but there is so much more to it. Your vocal health should be something on the top of your priority list.

Your life as a singer can be very hectic – between practices, rehearsals, and performances, you can put a lot of strain on your voice. To maintain the health and well-being of your singing voice, here are ten tips that can assist you moving forward:

Warm-Up/Cool Down

This should come as no surprise but doing warm-ups for your vocal cords can assist in keeping your singing voice primed and ready for action. Think of it as doing a workout;  you want to warm those muscles up before you lift some weights.

There are many different types of warm-ups that you can do before a performance, and it’s a good idea for singers to use these techniques before hitting the stage.

Techniques 

  • Tongue Rolls
  • Lip Bubbles
  • Vocal Seesaw
  • Octave Jumps
  • Elevator Slides

Any of these can be helpful in producing an effective vocal warm-up, are easy to do, and should take you about ten to twenty minutes before you start singing.

Cooling down

After you have finished singing your heart out, it is imperative to cool it down. Cooling down can be a quick five to ten-minute process that will help relax your vocal folds. Do a few gentle lip rolls or yawn while raising your soft palate and descend your voice slowly. Doing so will release any built-up tension from singing and is an all-around benefit for aiding vocal health.

Keep Hydrated

When you sing, your vocal cords vibrate very quickly, and if you are not staying hydrated, your voice can become hoarse. A very simple and effective action that you can take to prevent this is to drink water. Water will keep your vocal cords lubricated and will make singing a lot easier on your voice. 

Along with water, there are foods that you can turn to that are great sources of hydration:

Foods

  • Apples
  • Grapes
  • Watermelon 
  • Plums
  • Pears
  • Applesauce

Avoid Harmful Substances

It may come as no surprise, but smoking cigarettes or vaping is a great way to ruin your voice; your vocal cords are being attacked by numerous amounts of toxins and smoke anytime you take a deep inhale.Smoking/vaping  can irritate or dry out your throat, making it progressively harder to maintain your voice and vocal health too.

Alcohol is both dehydrating and inflammatory, which impacts your voice, as does the sugar from any mixed drinks. When you can, only drink water.

Natural Products

Sticking to products that help how you sing are a bonus in keeping your vocal folds well. Natural products like throat lozenges and sprays that have slippery elm in them work well. Drinking herbal teas is a great way to keep your voice lubricated and to maintain vocal health. When you can, avoid refined sugars and look for products that use honey instead. 

Breaks/Vocal Naps

Much like working out, your body needs a rest day so that you don’t overwork it, putting it at risk of injury. The same thing can happen to your voice when you don’t give it a break after a performance, as it too can become fatigued. Whether you’re rehearsing or performing, pushing too hard on a tired voice can put you in an unpleasant situation. If you have a cold or feel allergies coming on, you should let yourself have a break. 

It is essential to give your vocal cords a nap, meaning you need to avoid talking or singing for at least ten to fifteen minutes. This can be done every two or three hours and should be practiced after a performance as well. Listen to yourself when you perform, know when you have a tired voice and when to take breaks; this will benefit your body. 

Humidifiers 

Humidifiers are a good investment for a singer; they can be placed somewhere in your studio, home, or room overnight. A humidifier can moisten any dry air, improve your respiratory health, and prevent your vocal cords from going dry. You will find that breathing in properly humidified air can help you keep your voice prepped for any upcoming performances.

Quality Sleep 

Getting a good sleep at the end of your day is beneficial in recharging your body. A lack of sleep can fatigue you and your body, which will impact your voice as well. How will you sing when your voice sounds as sleepy as you feel? Getting a recommended amount of sleep is paramount for your vocal health and ensures you don’t perform with a tired voice.

Keep Your Throat Relaxed

When hitting those high or low notes, keep your throat and neck muscles relaxed. Trying to strain when you’re supposed to be relaxing them will damage your vocal cords and will impact your voice in the future. 

Avoid Clearing Your Throat

Excessive throat clearing is a big no-no. It may not always feel like it, but what you are essentially doing is violently slamming your vocal cords together. Throat clearing can cause further inflammation or irritation which will prevent your vocal folds from coming together when you need them to. The next time you feel that you need to clear your throat, drink some water, which is a better alternative for your vocal health and your singing career.

Do Not Sing From Your Throat

The throat is a big part of how to project your voice, but you need to keep in mind that when the time comes, it needs to flow from your diaphragm. Learning how to properly sing with your body is probably the most important part of singing in general. Taking online singing lessons can assist in teaching you how to properly sing from your diaphragm and not from your throat. If you push from your throat, you will just further damage and strain it, which is not something you want. Remember, sing from your core; use your breath to support your breath while you sing. This should be on the top of the list for every aspiring singer. 

It’s a pleasure to indulge yourself in singing, and taking lessons can be wonderful! Singing lessons provide you with every important aspect you need to prepare yourself for your musical journey. Look into booking a lesson today, and you’ll be one step ahead in prepping your singing voice for the big stage.

How To Create A Music Practice Schedule That’s Right For You

Learning to play an instrument has many excellent perks, and maintaining a practice schedule is vital for increasing musical skills. Whether your goals are to improve your playing, build muscle memory, and/or understand the pieces better, setting aside a selected time of your day to practice should be scheduled. Unfortunately, there can be many distractions around to keep you from your practice routine, which can be demotivating. 

Here are some tips to help you stick to your goals:

Schedule

Practice sessions

Daily practice sessions might be hard to maintain, but scheduling a few sessions throughout your week can be easy. Have a look at your practice schedule and map out what days and times work for you. You might see that a morning practice will work for you one day, and practicing at night will work another. Keeping your routine flexible will help you look forward to practicing when the time comes. Set timers or alarms to remind you. 

Outline

Stick to an outline, as it can be beneficial when scheduling your routine. Knowing what to practice and on what days to do it will help you achieve your goals for the week. You will be able to see what tasks require more time than others, and that will help in the scheduling process. 

Make-up time

Life can be unpredictable, and scheduled plans don’t always have to be set in stone. Leaving a day here and there for a backup session is a wise choice in case something interferes with your practice. Take a look at your overall schedule for the week and try to leave space to spend any time making up for the lost practice time.

Lessons

Keeping up with your music lessons will make the practicing aspect easier because you know what you’re supposed to be practicing. Try to ensure that you are not scheduling your practices directly after a lesson so you won’t feel burnt out. Online music lessons are beneficial when working your practices into your busy schedule. Lessons can assist in strengthening your dedication to practicing, as you’ll want to share all your progress with your teacher.

Rest

Make sure you don’t overwork yourself while you practice your instrument. Other musicians may tell you that you should dedicate all of your time toward practicing, but that’s a bit extreme. Hard work and dedication are required, but so is rest. You won’t be able to retain anything or play any better if you are exhausted. Incorporating breaks into your practice schedule will aid in maintaining the required energy for regular practice time.

Practice Space

Sorting out a practice space designed for your music practice schedule is a must. Whether it’s outdoors or indoors, having a positive place for you to warm up, do some musical exercises, and work on your playing is essential. Practice in a quiet and peaceful area, as it can be less distracting and more comfortable for you. Feel free to change up where you practice once in a while; it adds different stimulation.

In an article by NPR, they suggested making sure you have the proper supplies nearby in your practice space, such as a pencil, paper, and eraser to make notations on the sheet music. Other accompaniments such as a tuner for the instrument, music stand, metronome, etc., should be in this space as well. 

Remove Distractions

You know yourself pretty well, meaning you know exactly what type of things usually distract you. Any student of music can be distracted by mobile devices, TV, friends, games, etc. The big distractors in your life can take away valuable time honing your skills. When it’s music practice time, make sure these distractions are locked away where they can’t tempt you. You’ll find that focusing your attention on learning will be easier when you aren’t checking your phone every five minutes. 

Accessibility 

Trying to keep your instrument close by instead of packing it away after each practice session can be helpful as you might find that the sudden spark of inspiration ignites, and you’re overcome with the sudden urge to play. It can happen at any time of the day, so create a specific spot to have your instrument ready in case inspiration calls. 

Goals

Mapping out your musical goals per practice schedule is a great way to organize and prioritize what you want to work on. It will make each session productive and provide a sense of direction to follow on your musical journey. 

Log your progress 

We forget things very easily in our lives. Keep a journal or organizer and follow it so you’ll always have a sense of what is to come next and where to make any adjustments if necessary. Logging your progress is also a motivation booster, as you’ll be able to look at a physical representation of how much you have been progressing. Adding notes about pieces you are working on or ideas for your own songs is useful for all musicians. 

Challenge yourself

It is okay to create challenges for yourself when setting your goals during a practice routine. These challenges can encourage you to work harder, stay dedicated and most importantly, create a fun atmosphere during your practices. Remember not to be hard on yourself if you don’t meet these challenges or goals, as it might just discourage you. Maintain a healthy and fun atmosphere while you pursue these goals and challenges.

Reward yourself 

Your music practice schedule can be a mentally and physically draining routine. It doesn’t hurt to reward yourself with a treat whenever you reach a goal. While this may appear as bribing yourself, it can be effective in inspiring you to work toward your goals. Planning things like a night out, seeing a show, or indulging in your favourite food or snack are great rewards to give yourself. 

As we stated above, practice is a very important aspect of furthering your music career, and it is paramount to create a proper practice routine. Look into the Academy of Music for any answers to questions you have, and/or sign up for the many classes offered that will add to the betterment of your music skills. This way, we can help you harness all your musical talents and assist with your musical journey.

Online Piano Lessons: Zoom Pointers

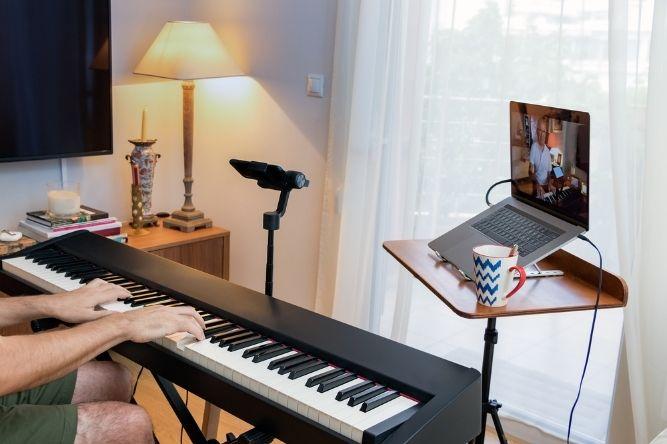
So, you have decided to tackle piano lessons and are concerned about what to expect when it comes to the first online lesson. The digital world has graced us with many options and possibilities for use in our daily lives, like online piano lessons. We see more and more benefits of the video conferencing service “Zoom” in our education, work, and social lives. There are plenty of advantages to taking a lesson online, but it can be confusing for those who do not have much experience using online video services. 

A piano lesson requires lots of focus, and worrying about what to expect during your online classes can hinder your concentration. We’ll go over all the pointers to prepare you and fill you in on everything you need to know before going into your Zoom lessons:

Internet 

First and foremost, you should ensure that you have stable and reliable internet access before you hop on your first Zoom lesson. Without the internet, you won’t have access to an online piano lesson. 

Connection 

You’ll want to check your connection to the internet. There are accessible services like Speed Test that allow you to see your download and upload speed. Some people prefer plugging their laptop or computer into their modem or purchasing Wi-Fi boosters that will strengthen their connection, making for a better Zoom session. 

In case you run into any difficulties connecting your laptop or desktop to the Wi-Fi, there are other alternatives you can take. Many devices can run Zoom, so if you own a mobile phone or device, you will be able to connect that way. 

Equipment

Devices

To be able to proceed with online piano lessons, you will need either a desktop computer or a laptop, such as an Apple or Windows, or a mobile device that is an iOS or Android. These devices will be able to run Zoom, so your teacher will be able to communicate with you. 

Video & audio

While cameras are not always required to use Zoom, you will most likely need to have one to appear on the screen. The piano teacher will need to see you and how you play to be able to give you tips and informative instructions. An HD webcam will suffice for these lessons and are quite accessible and affordable to find in stores that sell electronics. If you own a laptop or a mobile device, then you’ll already have a camera that is built-in. 

The audio aspect of your online lesson is perhaps the most essential part. Along with your teacher being able to see you, they will need to hear you and vice-versa. Most laptops and mobile devices will have a built-in speaker and microphone. Desktop users need to have speakers and a microphone hooked up to fulfill the audio aspect of their lesson.

Headphones

Headphones are a useful alternative in case you don’t have speakers. You can plug them into the audio jack and hear your piano teacher a bit more clearly. Headphones and earbuds are widely popular items and can be found at many electronics stores. Keeping a pair handy is a good idea when going into a lesson.

Setting Up

Before setting up for your online lesson, you have a couple of options when it comes to Zoom. You can download the app onto your computer or mobile device, which may make things a lot easier and more convenient for you. You can also use Zoom through your online browser, which will save you some space on your hard drive if need be. 

Lesson space

Once you have the proper equipment needed for your online lesson, then you can figure out your space and set it up. Make sure you and your piano are in view, as your teacher will want to see you. Depending on what time of day your lesson will be, be mindful of the lighting situation in the room. You will not want to be learning the piano in the dark, so make sure you and your piano keys are visible so your teacher can see you on screen.

Make sure your lesson takes place in a quiet place where you will not be disturbed or pick up any background noise. Having an outlet nearby is recommended to ensure your device is charged. 

Using Zoom

The process of using Zoom for your online lessons will not be hard to figure out. However, anyone who hasn’t used the service might be wondering how to go about it. We’ll break down the step-by-step process so you will not run into any issues on your way toward mastering those lessons: 

Step-by-step process

As you set up Zoom on your device of choice, you’ll be met with some important prompts and features:

  • A link will most likely be provided for you by your piano teacher. Clicking the link will bring you to the lesson at your designated time. 
  • If you have not already, you will be asked to enter your name. This way, the teacher will know who you are.
  • Zoom will ask if it can access the camera, to which you will click OK. This is important to get the visual part of the lesson going. 
  • You will be asked to join the call with video. Click that prompt. 
  • Zoom will ask if it can access the microphone, which you will allow. Then your teacher can hear you.
  • Zoom may ask if it can send you notifications, which you may want to allow. This will be useful in knowing when your lessons have begun or ended, as well as knowing if there has been something entered in the chat portion. 
  • You will have access to advanced settings by choosing “enable original sound.” This way the music will come through more clearly for your instructor, as well as for you.
  • You may find that there is a recording option on Zoom. Using it may be helpful to you when you want to go back and recall some crucial tips in the lesson. 
  • Once you’ve finished the lesson, you or your teacher may end the call. 

It’s as simple as that. There’s no need to feel stressed or worried about your online lessons; you may find that you actually prefer their convenience. 

If you are interested in enrolling in Zoom music lessons, nothing is standing in your way. By following the above tips, you’ll see that learning how to play piano online is a highly accessible and comfortable opportunity. Don’t let the inability to meet in person deter you. Your piano lessons are waiting for you today!

The Dorian Mode: What Is It?

As a musician, you will come across many types of scales in music. While some may appear to be more familiar than others, there are a series of scales called modes. Modes are a type of scale based on one major scale, and of those that you will see is called the Dorian mode. 

The Dorian mode has become a very popular seven-note scale that has been put to use by many musicians. To help you get a better understanding of what it is, we will go over the important details.

What Is a Scale?

A scale is what a mode is created from. There are several intervals in a major scale:

  • 1. The root of the scale
  • 2. A whole step up from the root
  • 3. A whole step up from the second
  • 4. A half step up from the third
  • 5. A whole step up from fourth
  • 6. A whole step up from the fifth
  • 7. A whole step up from the sixth

There is also a natural minor scale, which is similar to a major scale, with some half steps where the whole steps used to be, making it an octave higher:

  • 1. The root of the scale
  • 2. A whole step up from the root
  • 3. A half step up from the second
  • 4. A whole step up from the third
  • 5. A whole step up from the fourth
  • 6. A half step up from the fifth
  • 7. A whole step up from the sixth 

 Because of the seven intervals, seven modes can be built off of it and can start in any degree of the scale. 

What Is a Mode?

A mode features a series of seven-note scales that are based on the major scale. They are put together by playing a major scale but starting on a different degree of the scale. 

Modes

  • C Ionian Mode: C D E F G A B. This major scale pattern starts on the root. It shares the same set of notes as the C major scale. 
  • D Dorian Mode: D E F G A B C. Starting on the second degree. This mode is a cousin to the minor scale and has become quite popular due to being used by musical artists like The Beatles in their song Eleanor Rigby, Michael Jackson in Billie Jean, and Miles Davis in So What.
  • E Phrygian Mode: E F G A B C D. In the third degree. According to Master Class, it features a minor tonality used to produce Arabian, Spanish, and North American music. 
  • F Lydian Mode: F G A B C D E. In the fourth degree. This mode creates an inspirational and uplifting sound popular in films and from composers like John Williams.
  • G Mixolydian Mode: G A B C D E F. In the fifth degree. This mode can be heard among the rock and blues scenes. 
  • A Aeolian Mode: A B C D E F G. In the sixth degree. Features the same note pattern as a minor scale. 
  • B Locrian Mode: B C D E F G A. In the seventh degree. This mode is rarely used, as it is considered dense and does not sound very pleasant. It is often used by musicians over diminished chords. 

Name Origin

Interestingly enough, all of the modes are named after cultures and religions found in ancient Greece. When looking at Homer’s Odyssey, “Dorian” is referred to as a group of people found in ancient Greek culture. 

The Dorian Mode

Often referred to as the Doric mode, the Dorian mode is the second of the seven mode scale. If you were to play all the notes in C major but started on D, you will have successfully played the Dorian scale. 

A combination of sad and brighter-sounding music can be made by using these scales, which other minor modes don’t have. 

Why Learn It?

If you are planning to write music, you will have more options by learning about modes. Each mode can be utilized to create different sounds of music, which is perfect for anyone wanting to play around with different genres.

Each of the modes can create a specific kind of mood. For example, the Lydian mode is quite effective in creating the improvisational intervals that are found in jazz music, while the Ionian mode creates a more upbeat feeling that is found in pop songs. The Dorian mode is known for its ability to produce both a melancholic and optimistic range of music, which provides more opportunities and fun for a musician to have. 

How To Learn?

Learning how to use the Dorian mode, as well as the other six, is not too difficult to achieve. Once you know a major scale, you can take the same notes and just start on a different scale step, and you will have successfully played in a different mode. 

If you have any confusion or questions about how the modes work or how to use them, you can find numerous resources like online music lessons that can equip you with everything you need to know. 

Practicing your listening skills can be an asset to understanding how the Dorian mode works. The Dorian mode can be tricky to track but can be found in many rock or metal songs. Songs that you can listen out for are Another Brick in the Wall by Pink Floyd, Get Lucky by Daft Punk, Blue Jeans by Lana Del Ray, and Wicked Game by Chris Isaak. By actively listening for its use in other musical arrangements, you will be training yourself to know when it is present in a song. 

Not only can learning about the modes of music help you strengthen your understanding of music theory, but it can also improve how you play. There are countless instruments that something like the Dorian mode can be utilized on, from guitar to piano or violin; the choices are endless. Look into Academy of Music today to begin the betterment of your musical ambitions.

5-String Violin: What It Is & Exactly How It’s Different

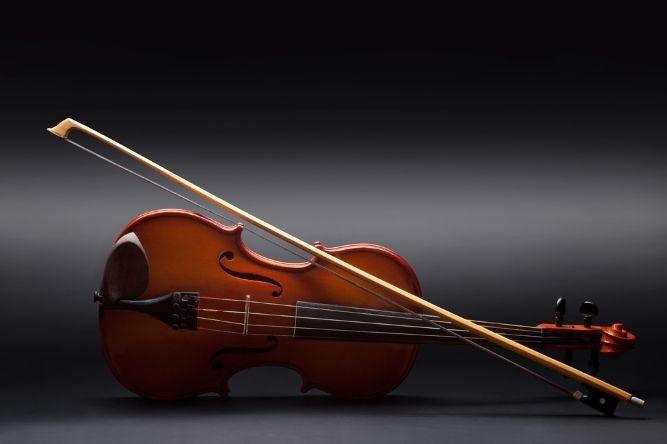
You may be familiar with the violin: A wooden 4-stringed instrument that follows the G-D-A-E pattern and is commonly chosen as the first instrument for musicians everywhere. There have been many different engineering capabilities with the instrument, like the evolution of the electric violin and the acoustic-electric violin. 

However, you might wonder if there is much difference between a standard violin and a 5-string violin. They are, of course, part of the same violin family, with one main difference being that the 5-string has (you guessed it) an extra string known as the C string.

This may lead you to want to pick up and learn how to play the 5-string, but maybe you want to know more about it and its differences. Here’s some info:


What Is a 5-String Violin?

As stated, a 5-string is exactly what it sounds like, but why the extra string? Here is a little information as to why this came to be. Instruments like violins, violas, upright basses, and cellos were created to be able to cover a wider range of sound. A violin features and projects a fantastically sharp E string but is unable to match the lower sounds of a viola. But why if you took the lower C string on a viola and added it to a violin? What does that get you?

C String

The C string is placed right before the G string on a violin, so you will see it in this order: C-G-D-A-E. By adding another string, you are giving the player more range and possibilities to play different parts and produce sounds that a regular violin is incapable of. Now you have an instrument that is capable of going beyond the violin’s usual range. 


The Differences Between a 4 and 5-String Violin

Necks/Strings

A 5-string features a wider neck to accommodate for the added string, whereas a 4-string has a narrower neck. Its narrowness means narrower string spacings. A 4-string will feature more space in between strings because it does not have to make room for the additional string.

The addition of the lower C string may have its player experience string crossings. To clarify, string crossings can occur when a bow hits any other neighbouring strings as opposed to playing on a standard violin. 

However, according to 3D Varius, there are numerous tests in the works to correct the issue of string crossings and spacings to create an overall better experience for the player, even in the 5-string electric violin realm.

Abilities/Sound

As a performer, you will have wider access to more notes while playing a 5-string violin. The added benefit is that you can get the full sound and range of both the violin and viola.

A bonus for any musician is that playing double and triple stops becomes a lot easier and means that there will be more possibilities to play around with different genres, like jazz, swing, and country.


Why You Might Want To Play a 5-String

If you already have a background in playing the violin or simply want to pursue the 5-string through taking online music lessons, you might want to know some information about the possibilities of pursuing a career or interest in this instrument.

Possibilities

If you are someone who enjoys arranging, writing, and composing music, the 5 strings can be extremely helpful to you, as it boosts the possibilities and ranges that you, as a musician, can reach. If you extend your lower range with an added string, you will gain access to several extra notes, including half steps.

With the addition of the 5th string, you can find your overall preferred timbre, which is essentially the tone of music you want your instrument to create. You may find that a richer and darker tone can be achieved when you play on a 5-string. 

You do not necessarily have to stick with a wooden 5-string violin, as we live in a world that has progressed to 5-string electric violins. These violins may provide a better sound if you are going for a lower tone across the range, especially with a 5-string acoustic-electric violin, as it can produce better sound quality.

A great added benefit of using a 5-string violin is that you will find the ability to cover parts that a guitar can typically play. This will give you the ability to cover guitar solos and rock songs and can all be achieved with the addition of that string. 

Along with the guitar parts, you will also be able to cover parts that the viola can play as well. While it will be an octave higher, you will be able to cover more ground and become more versatile when it comes to playing in gigs or music shows. 


Are They More Expensive?

If you are serious about pursuing this instrument, investing in a violin will save you a lot of time and hassle. It will, however, cost money. There can be a difference in price when looking at a 5-string, but the same can be said about a 4-string as well. They can go anywhere from $1000-$3000, but that is not to say you cannot find less expensive methods. Renting instruments or buying them second-hand may be an alternative to you, but when it comes down to quality, you will want to make sure you are choosing wisely. Local music stores can be a huge help in aiding your instrumental needs.


How Much Work Is required?

If you are already used to a regular violin and want to make the switch over to a 5-string, you may be concerned about how much more work it would be for you to adapt. The same can be said for anyone who has never touched a violin at all. 

Challenges 

Because of the size of the violin and its neck, the addition of another string is something a violin player will have to be aware of, especially with their bow placement on the strings themselves. As stated before, the placement of the strings is much closer together than they are on 4-stringed instruments like the violin or viola. You may have a few slip-ups when you first learn how to play by accidentally rubbing against or hitting the accompanying strings. It will take some time, but it is an issue that can be corrected and avoided. 

You may want to consider what strings and bow you want to move ahead with. Some musicians may decide to use viola strings on their – string violin, which are thicker and may require more pull from the bow. However, a regular violin bow may not be strong enough to create the full sounds that a 5-string can produce. Some opt-out for viola bows instead, as they are heftier and can give the player more control over how they play. 

Practice

Like any instrument, your 5-string violin will require a great deal of practice to perfect and get the hang of it. The only added difference of practicing when it comes down to a 5-string violin is just the extra string. The more times you play, you will come to find how quickly you can adapt to a new instrument. 

Do not let more strings be a concern of yours when it comes down to practice. Just look at the guitar or other musicians that make the switch from a violin to a viola. Additional strings and size will not affect how you learn to play your instrument as long as you take the time to practice. 

Lessons

Luckily for aspiring musicians everywhere, you will not have to go about learning any stringed instruments on your own. There are many resources and places in your community that you can seek out for violin lessons. Learning about string theory, the history of music, and your instrument will boost your understanding of the instrument. Many courses and methods can aid you in playing and practicing.

The 5-string violin is a magnificent instrument with a lot of potential and possibilities to find. If it is something you want to seriously consider, then sign up for lessons, as they can be the first stepping stones toward conquering a new instrument.

Keyboard vs. Piano: What Exactly Is The Difference?

For most music lovers, the idea of playing an instrument can be exciting but difficult. There are many options to choose from, but starting on the piano is an excellent choice for a first instrument. While there are advantages to be had with the piano, you might run into some confusion about where to start. There are differences to factor in when choosing an acoustic piano or a digital/electric keyboard. Here are the perks of each side to help in your curiosities: 

What Is an Acoustic Piano?

Acoustic pianos are made of a wooden or metal exterior that features hammers and steel strings built within them. The piano has weighted keys connected by the steel strings to the wooden hammers so that when you press a key, the hammer strikes, creating a vibration, which creates sound. 

What Is a Digital Piano?

Digital pianos are not acoustic instruments. When the keys are pressed, the sounds are produced electronically.  The speakers will play back high-quality recordings from an acoustic piano and/or other instruments, like violins and drums.

Sound

Quality

The sound quality and options will vary between these two instruments, considering what options you like when it comes to the possibilities of sound. 

  • An acoustic piano produces sounds that are amplified physically. According to Liberty Park Music, it gives you a more authentic sound with better control over the articulation of the musical notes. 
  • A digital piano will copy the sounds an acoustic can make, as well as a variety of other sounds like the organ, synthesizers, sound effects, etc. The keyboard is installed with digital files that have different options for sounds, but you will lose the authentic sound of an acoustic. 
  • You get volume options when sticking with a digital keyboard, as well as an output to plug in headphones. This way, you can practice in private or use the volume knob to decrease the sounds. 
  • Some keyboards have a recording function, so you can record what you play. This is beneficial for anyone learning how to play piano and convenient for online music lessons.  

Feel

There will be a difference in feel when it comes down to playing these instruments; acoustic pianos vibrate.

Touch

  • An acoustic piano has weighted keys which require a little more finger strength than a keyboard. 
  • The strength and movement of your fingers on a piano will determine what tone of sound you will get, giving a different range of sound on a key. 
  • An electric piano may lack touch sensitivity when it comes to playing, which is why some manufacturers have created weighted keys to mimic the same feel of an acoustic. 
  • A standard piano has 88 keys, as do many keyboards, but not all keyboards feature 88 keys due to the size or model you choose. You will want to make sure you have 72 keys at the very least to ensure you have the ability to play many popular piano songs.

Pedals

Acoustic pianos have foot pedals to alter the instrument’s tone, whereas electric pianos might not.

Sustain Pedal

The right pedal on a piano is also referred to as the damper pedal. The player has the ability to string notes and chords together in a smoother fashion, effective for transitioning between notes. 

Sostenuto Pedal

Located next to the damper pedal and will work as a selective damper. When pressed, the sostenuto rod will engage and hold up the dampers that have been raised when the keys are pressed. This sustains notes that are depressed when the pedal is engaged. 

Una Corda Pedal

Located on the left side next to the sostenuto pedal and is referred to as the soft pedal. This thins out the tone of the piano, as it shifts the keyboard and action to the right so that the hammers do not strike all the strings. By doing so, the hammers will strike a string with a different portion of the head, resulting in a softer sound. 

Digital Pedals

Most keyboards will not come with pedals, but some models will include them. For those without, an input jack can be found on the digital keyboard where you can plug in a sustain pedal that you can purchase at any local music store.  This will be the only pedal you can add to your keyboard unless you find a digital upright piano that comes with the three-pedal arrangement. 

Size/Portability 

Pianos are always a good choice, but most musicians will learn quickly that the size and portability of your instrument will play heavily in which kind of piano you buy. A full-size piano can reach a weight of 454 kg (1000 lbs.) or more, while smaller-scale pianos, like an upright, can still be 227 kg (500 lbs.). This type of piano makes for an interesting and challenging move, not to mention the deciding factor of where you would place it in your home. 

Digital keyboards are much more lightweight and portable in comparison, making for easy mobility. These keyboards can come with a portable stand, which help for quick setups. Portability is good for any travelling musicians who want a light load. 

Maintenance 

Like anything you love, it is best to ensure your instrument is well taken care of. Acoustics, as well as digital or electronic pianos, need some TLC too.

Cleaning

  • Steinway recommends disinfecting your piano keys with over-the-counter hydrogen peroxide, as it is safe for piano keys. Make sure to use a cotton pad or soft cloth when doing so, followed by drying with a towel. 
  • An acoustic piano has more surface area to cover when wiping it down. When using a clean cloth and minimal warm water, make sure you don’t let any liquid in between the keys, as it can cause swelling within the piano. 
  • A keyboard requires the same treatment but with less surface area, making for a quicker clean. 

Tuning

  • You will have to know how to tune your acoustic piano, as it will require tuning every six months or so, depending on how often it’s played. 
  • Some musicians may need the assistance of a professional when it comes time to tune the instrument. 
  • Seasonal changes, temperature, and humidity can contribute to your piano being out of tune.
  • Keyboards do not require any tuning, although the quality of their speakers can go out over a period of time. 

Price Difference 

When choosing your piano, the topic of the price will surely be a concern for you. When looking at an acoustic piano, they can be thousands of dollars. A digital piano, on the other hand, is much more affordable, hanging in the low hundreds, although higher-end models can be much pricier. 

Regardless of what decision you make when looking at the differences between keyboard and piano, online keyboard lessons are always beneficial to anyone looking to learn. The techniques you’ll learn will help you excel in your musical ventures and assist you when it comes time to making the decision: Keyboard or piano.

The Best Ukulele Songs To Play For Any Occasion

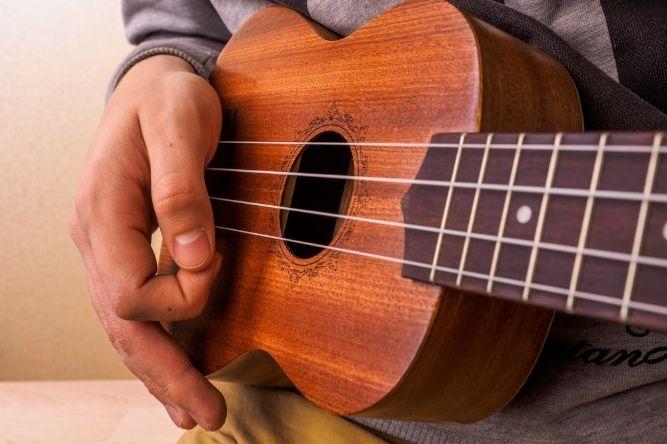
So many musicians have featured the ukulele in their works through many decades, making the instrument an instant classic. With its soothing and satisfying sounds, it is no wonder that many music lovers decide to choose it over the likes of an acoustic guitar. Just four strings and easy to tune, the uke is a great instrument to pick up for any beginner with an interest in playing.

As you begin to experiment with different ukulele songs, you might consider taking ukulele lessons in order to get a basic understanding of the instrument. After you have done so, you might then wonder which songs are the best to play for anyone on any given occasion. 

Where To Start?

Traditional Hawaiian 

You can’t go wrong with music from the origin point of the instrument itself and some great ukulele songs from Hawaiian culture. Hawaii is what people typically think of when they hear or see a uke because its ties to Hawaiian culture are very deep. The last monarch, Queen Lili’uokalani, wrote one of Hawaii’s most famous songs, titled Aloha’Oe. It became one of the most popular ukulele songs and is a great song to play for a relaxing mood and a great introduction for beginners.

Another one of the most fun ukulele songs is Somewhere over the Rainbow, covered by Israel Kamakawilo’ole. It is a classic song from The Wizard of Oz which has garnered many renditions. Israel’s ukulele-based version is really lovely, extremely recognizable, and features a simple strumming pattern and chord changes that are easy to learn. 

Pop Music

Pop songs of the 20th century are some of the most played and most well-known to the public, so you can’t go wrong with playing one. There are so many that feature the uke, with a wide variety to choose from. 

A go-to song that many beginners flock to is I’m yours by Jason Mraz, which is a ukulele song at its core. According to Consordini, the song is pretty simple and exemplifies that you don’t need to be a prodigy to learn how to play something on a ukulele. It features a basic strum pattern and easy chords, so it’s perfect for a beginner or a quick learner. This widely popular song is romantic and joyful and one of the best ukulele songs for weddings.

Riptide by Vance Joy is also considered another of the best ukulele songs to learn. It’s fun and can get people singing, as it is super catchy and a more recent ukulele song of the last ten years. Perfect for parties and get-togethers, the song is a real crowd-pleaser. 

One of the most iconic songs that everyone is sure to know or recognize is Can’t Help Falling in Love by the great Elvis Presley. This song has easy lyrics to memorize and is great for a challenge, as it can be played in many different ways. It is tender, comforting, entertaining, and in some cases, somber. This song can be played on virtually any occasion and can fit the tone and mood of the room instantly. 

Cover Songs

Covering any popular songs is always a good move, as they can be transformed into great ukulele tunes almost instantly. A very well-known cover that features a uke is Dream a little dream of Me by Gus Kahn,  famously covered by The Mamas and Papas. The song has been covered so many times and in many different ways, making it highly identifiable. 

Learning a different variety of songs that you can cover is a good choice in preparing your song toolbox; this way, you’ll be ready for any event that requires a specific kind of ukulele song.

If you are serious about pursuing the ukulele as your instrument of choice and you wish to get more information about lessons, visit Academy of Music. You will find everything you need for fulfilling your musical needs and be put on the right track toward learning the best ukulele songs that you can play for anyone, anywhere, anytime.

Cadences In Music

Cadences are an essential factor in understanding music theory. Learning about what they are and how to utilize them will save you a lot of time when it comes down to playing or reading music. You may have several questions, which is why we are here to break down everything you need to know about cadences in music.

What Is a Cadence?

A cadence acts like punctuation but in a musical sense. It is typically made up of at least two chords that are next to one another at the end of a phrase.

Phrase?

When we speak or write, we tend to group words into phrases to create sentences. In music, we do the same with notes, to create rhythm and melodies. 

Cadences assist in making the music feel complete, like a period in a sentence, or create a sense that there is more to come, like a comma. They help build the music up or wind it down, giving it a sense of direction. 

Types of Cadences

As you begin to come across cadences, you might notice that there are some that sound complete while others do not. The reason for this is that there are four main types of cadences that you will hear: 

The Authentic Cadence  

The authentic cadence, also classified as a perfect or imperfect cadence, moves from the dominant chord V and the tonic chord I. Of all the cadences, this is the one that sounds the most finished. 

  • Perfect Authentic Cadence: The chords will be in root position, which means they will be placed in the bass, whereas the tonic will be the higher voice in the final chord. This will produce a stronger type of cadence found in music.
  • Imperfect Authentic Cadence: There are three different kinds of imperfect authentic cadence. The root position IAC is where the highest voice is not featured in the tonic area. An inverted IAC is similar to an authentic cadence, but one or both chords will be inverted. A leading tone IAC is when the V chord is replaced, but the tonic will still end on the I chord. 

The Plagal Cadence

A plagal cadence consists of the chord progression IV and I and is used at the end of a phrase in music, creating a sense of finality. It is often referred to as the “Amen cadence”, as it was commonly used to end Hymns. 

The Half Cadence

The half cadence is when any cadence ends on a V chord despite whatever chord comes before it. It will usually sound incomplete and sometimes suspended, resulting in it appearing weak and calling for more. Half cadences are not typically used to end a piece of music but can be found in the beginnings of choruses or verses. 

The Deceptive Cadence 

The deceptive cadence (sometimes called an interrupted cadence) is the progression in which the V chord will move to a chord that is not the I chord. It is called “deceptive” due to the listener expecting to hear the resolution with the I chord but receiving an incomplete feeling instead.

Other Factors

Rhythm and Melody 

As cadences are crucial in putting music together, other elements such as rhythm and melody play accompanying roles in producing a cadence. There are numerous possibilities and important aspects to remember when piecing it all together:

  • The top notes in a phrase impact how an authentic cadence works. 
  • You will get a better sense of finality when a tonic note sits on top of a tonic chord.
  • A strong or weak beat can impact the effect of a cadence. You may want to consider having the final chord fall on a strong beat instead of a weaker one. 
  • Keeping both chords in a root position can create a stronger cadence. 
  • If the chords are inverted, the cadence ending will be reduced. 

How To Use Cadences

Understanding cadences is a helpful tool when it comes down to composing or arranging music. By knowing the basics, putting together different types of musical phrases will feel a lot easier. You can have anything from phrases that finish with a grand sense of finality, like with an authentic and plagal cadence. You can get a sense of continuation or of idleness in a phrase, like with a half cadence or deceptive cadence. 

By combining different types of phrases, a bigger section of music can be produced, which can be identified as a “period.” A period is two or more phrases that go together. 

When structuring music, a cadence should be at the end of every phrase, with the last cadence of a period being the strongest in the group. Phrases will usually come in groups, sometimes two, three, or more, but the last one will always be the strongest. 

Music Radar suggests that listening to other songs by acclaimed musicians can aid in understanding and spotting cadences. Songs like I Will by The Beatles or Guilt by Nero are a couple of examples of a deceptive cadence and a perfect cadence. Listening is a useful tool in discovering how music works, especially in cases where cadences are involved. 

Common Misconceptions 

  • Not every cadence has to act as a moment of rest in a song, nor does it need to end on a long note. You will notice many cases where this is present, but it is not a requirement in writing music. 
  • A cadence does not always need to end a song, as some of them are designed to create tension or bridge different parts of the song together. 
  • Some musicians may ignore their relevance, but cadences continue to influence music even today. Understanding the differences of plagal cadences and how to use a half cadence will be useful in composing music. 

Anyone can access information about cadences through online music lessons provided by Academy of Music. We strive to ensure that your music knowledge expands and that any needs will be met with our lessons and information. Sign up today to improve your understanding and strengthen your musical talents.

How To Stay Focused While Practicing Piano

The piano is one of the most universally iconic and enjoyable instruments, appearing in countless forms of entertainment. It is no surprise that it is a go-to instrument for many who wish to master music. However, learning piano requires a great deal of concentration, time, and practice, which is why so many individuals do not go through with completing their piano journey. 

To stay focused in an age where your concentration can be broken by so many distractions is no easy feat. Piano practice has to be met with dedication, and that can often be thwarted with temptations from our devices or hanging out with friends, etc. Despite how much you may love the piano, it may always seem like something is pulling you away. Here are some helpful tips to assist you with practicing: 

Tips

Create Goals

Taking on the piano can be intimidating at first. Creating goals for yourself in a journal or agenda can help you maintain concentration and organize how you go about practicing, ridding you of any unmotivated feelings. You can even be competitive with yourself, which will result in you putting in more effort and having fun. 

Take a Break

Practicing for a lengthy period can be exhaustive and could indirectly halt your progress. Feel free to take breaks when appropriate or set an alarm for five or ten-minute breaks, but use that time wisely. Get a drink, a snack, walk around or give yourself a rest to improve those energy levels. Pianist Magazine highly recommends taking a moment, as it can increase your learning retention and effectively keeps you focused. Use your break effectively and wisely to avoid any distractions.

Designated Time

Choosing one designated time each day can help in creating an organized schedule. You will not be as tempted to make plans when you know you have a piano practice session. Pick a time of day that works for you. Other pianists may have an ideal time to practice piano, like in the morning or the evening. Choosing a time can be beneficial in the piano learning process.

Warm-Up

The idea of a warm-up before practice may seem time-consuming. Warming up is wise for many reasons, from preventing carpal tunnel or tendonitis to simply improving your flow when playing. You will spend less time being rusty during practice which is always a bonus for developing playing skills. 

Slow Down

Putting pressure on yourself to learn specific songs that require a lot of work might not be good for you. Learn them at half speed and when you feel comfortable, play faster. Use a metronome and pay attention to the speed and listen to the notes; you will notice a difference in your piano performance. 

Enjoy the Music

As a pianist, you want to enjoy the music you play. If you are playing music that you don’t like while you practice, you’ll find yourself unable to concentrate and may begin to feel unmotivated. Choosing tunes you enjoy will boost your interest and help you stay interested.  

Be Positive 

Making mistakes and having trouble learning the piano is perfectly okay, as it is a part of the journey. Most musicians and composers found difficulty mastering their instruments, whether piano, guitar, or saxophone. Make sure to keep playing and continue your practices, as you will find that it will only be a matter of time before you start to sound like a focused and professional pianist. 

Signing up for piano lessons can help further your training and strengthen your musical understanding. With classes and practice, you’ll definitely hear significant improvements.

Go to Top