

When you purchase a piano, there is one type of maintenance that is essential to its quality and longevity: tuning. It takes time, patience, a trained ear, and a lot of practice to master the art of tuning. It involves a lot more mechanical know-how and precision than tuning a guitar. But by learning to tune a piano yourself, you can save money on hiring someone else to do it. Better yet, you’ll be keeping your instrument in top shape so that it holds the tuning for longer. If you’d like to learn about the process of piano tuning, we’ve put together the basic steps.
Why is tuning a piano important?
If you’ve ever heard an instrument that’s played out of tune, you’re familiar with the headache that this sound induces. Something is just off. No matter how proficient you are at playing your favourite song, a piano that’s out of tune will ruin it every time.
There’s a reason why people recommend that you tune your piano twice a year (it’s not just to support the piano tuning industry). The strings in a piano are taut with high tension. Over time, they stretch and change the pitch of the keys. When a piano is tuned regularly, it’s easier for strings to maintain the right tension. But left without being tuned, they stretch more and more over time; this can cause a string to be damaged when played, or it may require a complete restringing of the instrument. It’s always less expensive to maintain your instrument properly than deal with costly fixes.
Before we delve in, a word of warning: tuning a piano is no easy task. You run the risk of damaging the strings or pins by doing it yourself. Stretch a string too tightly and you risk breaking it. This is why most people pay a professional to tune their instruments. This post is intended to give you a clearer picture of what piano tuning entails.
What tools will you need?
- A lever. This tool (also known as a hammer, key, or wrench) fits around the pins of the piano.
- Mutes. To tune efficiently, you need to isolate the note in question. Mutes, which are rubber wedges that fit between strings, help with that. They block the sound from surrounding strings so you can tune one at a time.
- Electronic tuner. Chromatic tuners will tell you the exact note that you’re playing. It’s invaluable when tuning to get the pitch just right.
- A light. You’re going to be looking at a lot of strings up-close; a proper light source is invaluable.
- A screwdriver. This is an essential tool for pretty much any DIY project. How else will you get under the hood of the instrument?
When you’re shopping for tools, you might be tempted to pick the least-expensive options; after all, what’s the point in tuning a piano yourself if you pay more for tools than you do for a tune-up? But quality pays off when it comes to this type of maintenance, so don’t be afraid to shell out a few extra dollars.
How do you tune a piano?
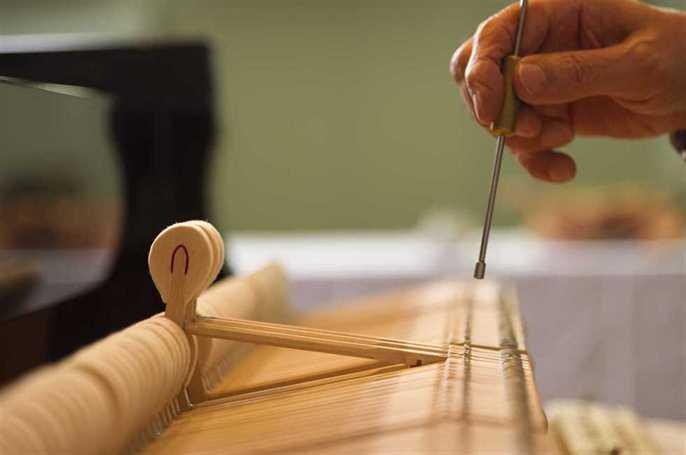
Your tools are ready and the house is silent: it’s time to tune your piano. Open the piano up, and let’s get started.
- First, begin by finding the middle C (the middle octave, or C4). Secure the lever, hammer, or wrench to the pin.
- Each note has a certain number of strings; some have three, while others have two. When there are three, tune the one in the centre, but if there are only two, pick the one on the right.
- Place mutes on the strings that surround the set to isolate the sound.
- Turn on your electronic tuner and begin to play the note repeatedly. Turn the pin to the right until it’s in tune with the chromatic tuner. Be careful not to tighten the string too much or it may break.
- Now, you’ll use that note as a reference to tune each subsequent set. It’s important to use your ear to tune instead of your device. Why? It’s due to the inharmonicity of your piano. This term describes how a properly tuned piano should not be tuned to an equal tempered scale (AKA, your electronic tuner). If it were, some notes would sound too sharp, while others would fall flat. This is due to our sensory perception of the notes.
- Adjust the mutes so that your tuned string is free, but the ones surrounding it are not. Use your ear to tune this following set and remove more mutes as you move along the keys.
- You’ve just finished tuning the first octave. Congratulations! This will be a useful reference for the rest of your strings. For each subsequent octave, use the corresponding note in the tuned set.
If you’ve followed all these steps, you’ll have a beautifully tuned piano on your hands. Reading this content may have inspired you to pick up the phone and call a piano tuner instead. Or, it’s made you more interested than ever in buying a piano for yourself.
At Academy of Music, we have a wide selection of instruments for you to choose from. Visit our website to view our pianos for sale. We include a tuning with every purchase.